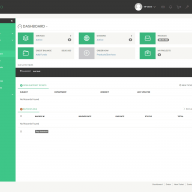
Download APICodes CPanel script
H
Offline
Hi guys, I found this script on the Internet, that I want to share here with you:
Note: I do not offer any kind of technical support, please try it at your own risk if you consider yourself adept at this kind of things.
Requirements:
Hosting which can be either cPanel hosting or shared hosting or even a dedicated server.
A dedicated server OR a VPS with at least 2GB or RAM and a decent CPU. running Ubuntu 18.08
A Cloudflare account, which is free.
Installation:
Part A (Setting up Cloudflare)
1. Create an account at .
2. Change your name servers for your domain.
3. When domain is set up, enable force https and change ssl to flexible.
4. Set the following DNS settings.
Part B (Hosting the script)
1. Download the script and then extract to your desktop.
2. Log into your hosting as you would usually to access file explorer on hosting.
3. Copy the contents on "/new/source_cpanel" onto your server.
4. Go to your URL and it show display the script.
Disclaimer: This will run without the load balancer or proxy HOWEVER if API Codes closes their proxy the script will no longer work so it's best you create your own.
Part C (Creating the Load Balancer and Proxy)
1. Log into your VPS or Dedicated server using a SSH like Putty or Termius.
2. Run the following commands.:
Code:
CD /root/
apt-get install unzip -y
apt-get install nano -y
unzip apicodes-gdriveplayer.zip
chmod 0777 setup.sh
setup.sh
3. Once the script has finished run the following command:
Code:
nano /root/LoadBalancer/models/CacheManager.js
change line 46 to the following:
Code:
CacheManager.KEY_ENCRYPT = 'apicodesdotcom'
The press CTRL + X followed by Y to save the file.
4. Once you've done the above run the following command:
Code:
nano /root/LoadBalancer/configs/servers.js
change line 4 to the following:
Code:
exports.NumberNode = 6; //The number of nodes you want to play
change line 6 to the following:
Code:
exports.DomainNode = [' INSERT YOUR OWN DOMAIN WITH NOT HTTPS OR FOLLOWING / ']; //Your primary domain
The press CTRL + X followed by Y to save the file.
5. Now run the next command:
Code:
nano /root/ProxyStream/models/CacheManager.js
change line 49 to the following:
Code:
CacheManager.KEY_ENCRYPT = 'apicodesdotcom';
Then press CTRL + X followed by Y to save the file.
6. Final edits, run the following commands:
Code:
nano /root/ProxyStream/configs/servers.js
change line 3 to the following:
Code:
exports.ALLOW_DOMAIN = []; //Domain you want to play.
7. Setting up NGINX with the proxy and load balancer.
Input the following command:
Code:
nano /etc/ngnix/ngnix.conf
The following section between lines 57 and 63 will be changes to be careful.
line 61 and 62 change to
Code:
#include /etc/nginx/conf.d/*.conf;
#include /etc/nginx/sites-enabled/*;
now on line 60 enter the following:
Code:
upstream LoadBalancer {
server 127.0.0.1:6666;
}
upstream ProxyStream {
server 127.0.0.1:6868;
}
server {
listen 80;
server_name proxy.yourdomain.com;
location / {
proxy_pass http://LoadBalancer;
proxy_http_version 1.1;
proxy_send_timeout 600;
proxy_read_timeout 600;
proxy_set_header Upgrade $http_upgrade;
proxy_set_header Connection 'upgrade';
proxy_set_header Host $host;
proxy_cache_bypass $http_upgrade;
}
}
server {
listen 80;
server_name sv1.yourdomain.com;
location / {
proxy_pass http://ProxyStream;
proxy_http_version 1.1;
proxy_send_timeout 600;
proxy_read_timeout 600;
proxy_set_header Upgrade $http_upgrade;
proxy_set_header Connection 'upgrade';
proxy_set_header Host $host;
proxy_cache_bypass $http_upgrade;
}
}
change line 70 to the following:
Code:
server_name proxy. INSERT YOUR DOMAIN WITH NO TRAILING /;
change line 86 to the following:
Code:
server_name sv1. INSERT YOUR DOMAIN WITH NO TRAILING /;
and that's it Proxy and Load Balancer are now sorted, you just need to run the following commands to reboot NGINX and Start them.
Code:
service nginx restart
pm2 restart all
That's all done now") just need to edit a few files on your hosting to use your new load balancer and proxy.
just need to edit a few files on your hosting to use your new load balancer and proxy.
Part D (Linking your Dedicated with your hosting)
1. Go to your hosting file manager again, and edit the config.php file and edit line 5 with the following:
Code:
$proxyDomain = ' . INSERT YOUR DOMAIN NAME WITHOUT THE TRAILING / ';
And viola done!
Spoiler: Edits
You may notice that you need domain.com/?login=admin for this script to work. You can remove lines 10 and 502 in index.php to make it public and work without the login.
OR
You can change the login name to whatever you like by editing line 8 in config.php to change the "password"
If you want to add pop ads or a watermark in the player then edit embed.php and add the advertisement code there.
Watermark code:
Code:
<a href="#" style="position:absolute;top:15px;left:15px;"><img src="IMAGE URL"></a>
I don't know how to ad VAST apologies if someone can put it in the comments I'll add it here.
Troubleshooting
Black screen on player is usually a problem when you've not set up SSL correctly. Go back through instructions and check.
Silence is golden is usually associated with you forgetting to add ?login=admin look at the edits section to change that requirement.
Showing two // on the embed link, remove the / from the lines 186 and 187 in the index.php file
All the credits to:
Titan

Note: I do not offer any kind of technical support, please try it at your own risk if you consider yourself adept at this kind of things.
Requirements:
Hosting which can be either cPanel hosting or shared hosting or even a dedicated server.
A dedicated server OR a VPS with at least 2GB or RAM and a decent CPU. running Ubuntu 18.08
A Cloudflare account, which is free.
Installation:
Part A (Setting up Cloudflare)
1. Create an account at .
2. Change your name servers for your domain.
3. When domain is set up, enable force https and change ssl to flexible.
4. Set the following DNS settings.
| Type | Name | Content | TTL |
| CNAME | www | @ | Auto |
| A | @ | Hosting IP address | Auto |
| A | proxy | Dedicated / VPS IP address | Auto |
| A | sv1 | Dedicated / VPS IP address | Auto |
| A | sv2 | Dedicated / VPS IP address | Auto |
| A | sv3 | Dedicated / VPS IP address | Auto |
| A | sv4 | Dedicated / VPS IP address | Auto |
| A | sv5 | Dedicated / VPS IP address | Auto |
| A | sv6 | Dedicated / VPS IP address | Auto |
1. Download the script and then extract to your desktop.
2. Log into your hosting as you would usually to access file explorer on hosting.
3. Copy the contents on "/new/source_cpanel" onto your server.
4. Go to your URL and it show display the script.
Disclaimer: This will run without the load balancer or proxy HOWEVER if API Codes closes their proxy the script will no longer work so it's best you create your own.
Part C (Creating the Load Balancer and Proxy)
1. Log into your VPS or Dedicated server using a SSH like Putty or Termius.
2. Run the following commands.:
Code:
CD /root/
apt-get install unzip -y
apt-get install nano -y
unzip apicodes-gdriveplayer.zip
chmod 0777 setup.sh
setup.sh
3. Once the script has finished run the following command:
Code:
nano /root/LoadBalancer/models/CacheManager.js
change line 46 to the following:
Code:
CacheManager.KEY_ENCRYPT = 'apicodesdotcom'
The press CTRL + X followed by Y to save the file.
4. Once you've done the above run the following command:
Code:
nano /root/LoadBalancer/configs/servers.js
change line 4 to the following:
Code:
exports.NumberNode = 6; //The number of nodes you want to play
change line 6 to the following:
Code:
exports.DomainNode = [' INSERT YOUR OWN DOMAIN WITH NOT HTTPS OR FOLLOWING / ']; //Your primary domain
The press CTRL + X followed by Y to save the file.
5. Now run the next command:
Code:
nano /root/ProxyStream/models/CacheManager.js
change line 49 to the following:
Code:
CacheManager.KEY_ENCRYPT = 'apicodesdotcom';
Then press CTRL + X followed by Y to save the file.
6. Final edits, run the following commands:
Code:
nano /root/ProxyStream/configs/servers.js
change line 3 to the following:
Code:
exports.ALLOW_DOMAIN = []; //Domain you want to play.
7. Setting up NGINX with the proxy and load balancer.
Input the following command:
Code:
nano /etc/ngnix/ngnix.conf
The following section between lines 57 and 63 will be changes to be careful.
line 61 and 62 change to
Code:
#include /etc/nginx/conf.d/*.conf;
#include /etc/nginx/sites-enabled/*;
now on line 60 enter the following:
Code:
upstream LoadBalancer {
server 127.0.0.1:6666;
}
upstream ProxyStream {
server 127.0.0.1:6868;
}
server {
listen 80;
server_name proxy.yourdomain.com;
location / {
proxy_pass http://LoadBalancer;
proxy_http_version 1.1;
proxy_send_timeout 600;
proxy_read_timeout 600;
proxy_set_header Upgrade $http_upgrade;
proxy_set_header Connection 'upgrade';
proxy_set_header Host $host;
proxy_cache_bypass $http_upgrade;
}
}
server {
listen 80;
server_name sv1.yourdomain.com;
location / {
proxy_pass http://ProxyStream;
proxy_http_version 1.1;
proxy_send_timeout 600;
proxy_read_timeout 600;
proxy_set_header Upgrade $http_upgrade;
proxy_set_header Connection 'upgrade';
proxy_set_header Host $host;
proxy_cache_bypass $http_upgrade;
}
}
change line 70 to the following:
Code:
server_name proxy. INSERT YOUR DOMAIN WITH NO TRAILING /;
change line 86 to the following:
Code:
server_name sv1. INSERT YOUR DOMAIN WITH NO TRAILING /;
and that's it Proxy and Load Balancer are now sorted, you just need to run the following commands to reboot NGINX and Start them.
Code:
service nginx restart
pm2 restart all
That's all done now
just need to edit a few files on your hosting to use your new load balancer and proxy.Part D (Linking your Dedicated with your hosting)
1. Go to your hosting file manager again, and edit the config.php file and edit line 5 with the following:
Code:
$proxyDomain = ' . INSERT YOUR DOMAIN NAME WITHOUT THE TRAILING / ';
And viola done!
Spoiler: Edits
You may notice that you need domain.com/?login=admin for this script to work. You can remove lines 10 and 502 in index.php to make it public and work without the login.
OR
You can change the login name to whatever you like by editing line 8 in config.php to change the "password"
If you want to add pop ads or a watermark in the player then edit embed.php and add the advertisement code there.
Watermark code:
Code:
<a href="#" style="position:absolute;top:15px;left:15px;"><img src="IMAGE URL"></a>
I don't know how to ad VAST apologies if someone can put it in the comments I'll add it here.
Troubleshooting
Black screen on player is usually a problem when you've not set up SSL correctly. Go back through instructions and check.
Silence is golden is usually associated with you forgetting to add ?login=admin look at the edits section to change that requirement.
Showing two // on the embed link, remove the / from the lines 186 and 187 in the index.php file
All the credits to:
Titan

Last edited by a moderator:
Relate Threads